Since Elementor 2.0, we have the introduction of Global Templates, such as Header, Footer, Single Page, Single Post, etc. Templates are used in Elementor to provide the look and feel you want for your site parts. Site parts are the basic functional group sections that form your website. Elementor gives you the opportunity to create Templates to customize the way you want these Site Parts to look and function.
What makes Global Templates really powerful is that you can control where they appear. For example, you can create three different header templates and choose to show one on the homepage, the second on the archives, and the third on the pages.
This functionality is provided through the ‘Display Conditions’ feature. You have the power to display your template for specific pages, posts, categories, child pages, parent pages, tags, etc.
Let’s dive in to learn more about this feature, which seems simple at first but is extremely powerful, can save us huge amounts of time, and can also make our website quicker to load and rank higher for accessibility demands.
See this tutorial in YouTube
How to create a Global Template in Elementor
To create a Global Template, you must first have the Elementor Pro version, as it is an Elementor Pro-only feature. You can learn more about how to get Elementor Pro here.
If you already have Elementor Pro or after you have installed it, go to Templates -> Theme Builder, as we see in the thumbnail below.
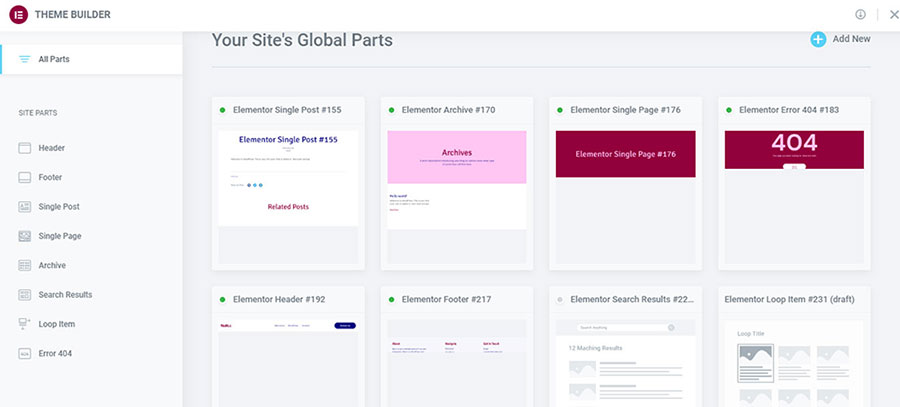
Theme Builder has 8 site parts you can customize in appearance and function according to your needs: Header, Footer, Single Post, Single Page, Archive, Search Results, Loop Item, and Error 404 templates.
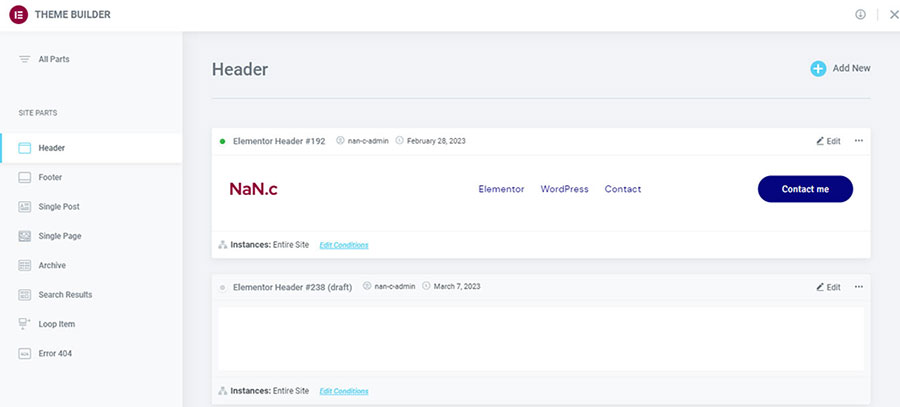
To create a custom template for each one of those site parts, either click on the plus icon next to the name of the item or click the name of the item first and then choose Add New in the upper right corner (Thumb 2).
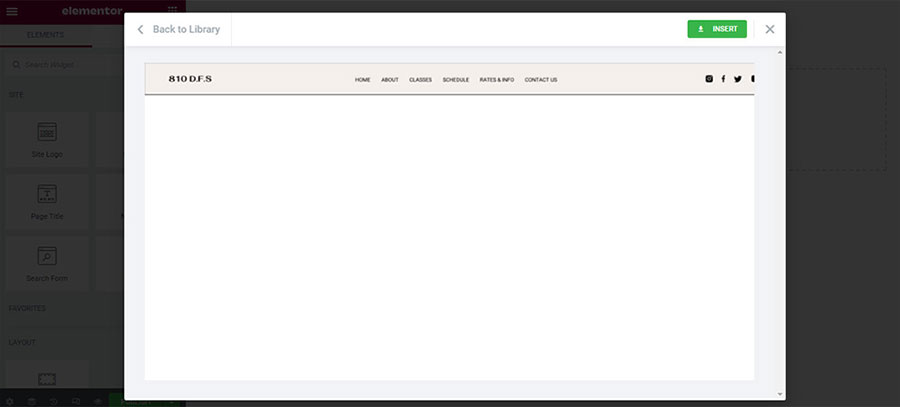
Let’s see that in more detail. Let’s say I want to create a new header. After I click Add New, Elementor will open a window where I can choose a header template from the Library. I can preview it first by clicking the magnifying glass icon. And then, when I find the one I prefer, I click insert to import it into my Header template (Thumb 3).
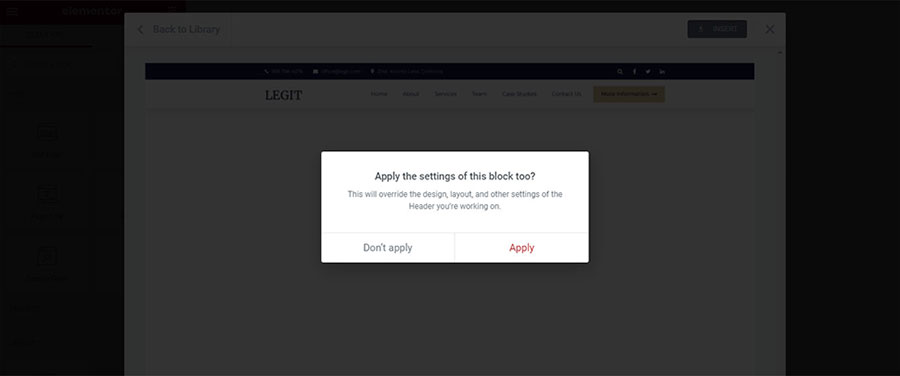
A message appears asking whether I want to apply the settings of this block as well. That means my already created styles for the website (fonts, colors, etc.) will not apply to the inserted block. I always choose ‘No’ because it saves me a whole lot of time from changing styles afterward. So, I click on the ‘Don’t apply’ button (Thumb 4).
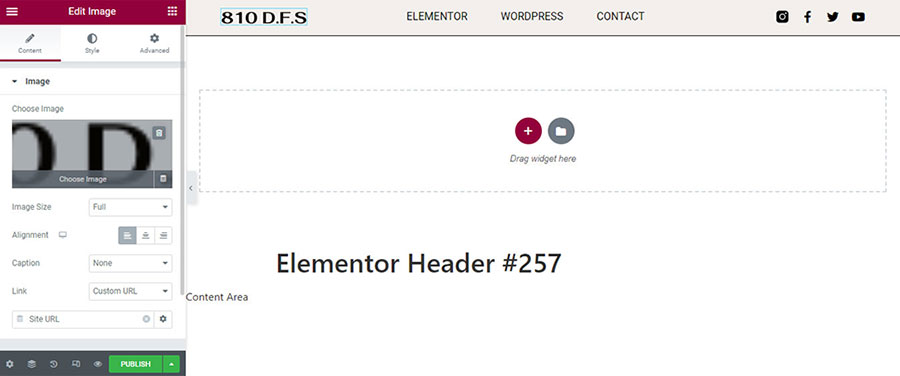
My header block has been placed on top, and you can see it in the navigator as well. I probably want to change the logo, so I click on the image, then choose the image from the left, and I insert my own logo (Thumb 5).
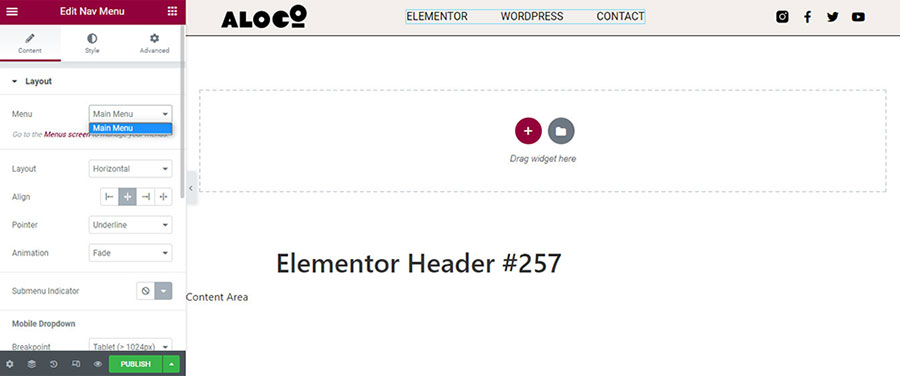
If I want to use another menu for this header besides the default one which is already selected, I click on the menu and choose another menu from the left dropdown option (Thumb 6).
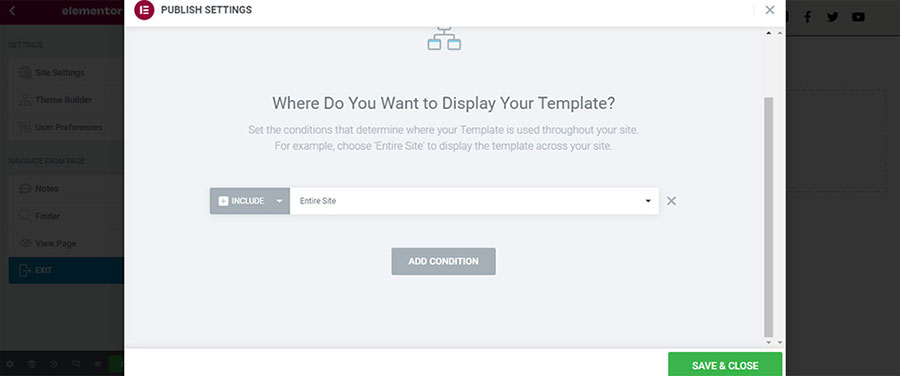
It looks like I have completed my header template, and I want to use it immediately. So, I go and hit “Publish.” Then, the “Display Conditions” pop-up appears.
I want to use my header across my entire website, so I click “Add Condition” and then “Entire Site.” I press “Save & Close,” and we are good to go (Thumb 7).
Understanding the Display Conditions Feature
The Display Conditions feature offers great customization options for your Site Parts and Global Templates. Let’s take the Header Template as an example and say I want to restrict its display only to my Homepage.
I go back to the Dashboard, navigate to Templates -> Theme Builder, and choose ‘Header’ from the left sidebar. We see that our template has a green dot on the left side of its title, which means it has been published and is now in use. We also see below the preview that it is live on the entire site. To change that, I can either click ‘Edit’ and change the Display Conditions from inside the template page, or I can directly modify them by clicking on ‘Edit Conditions’ (Thumb 8).

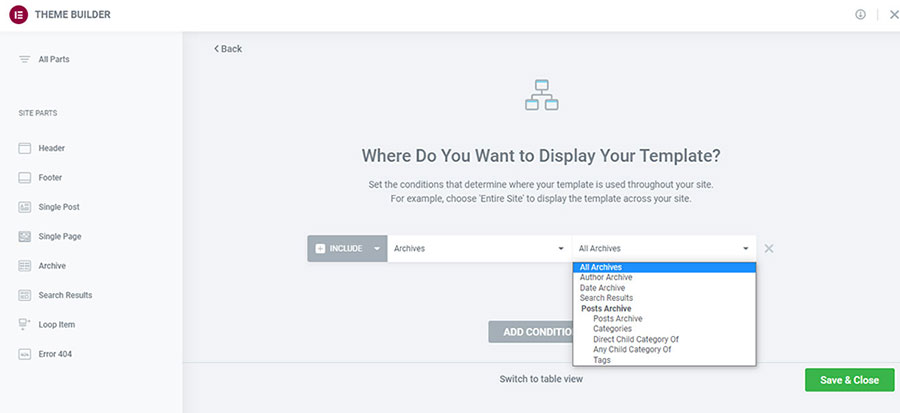
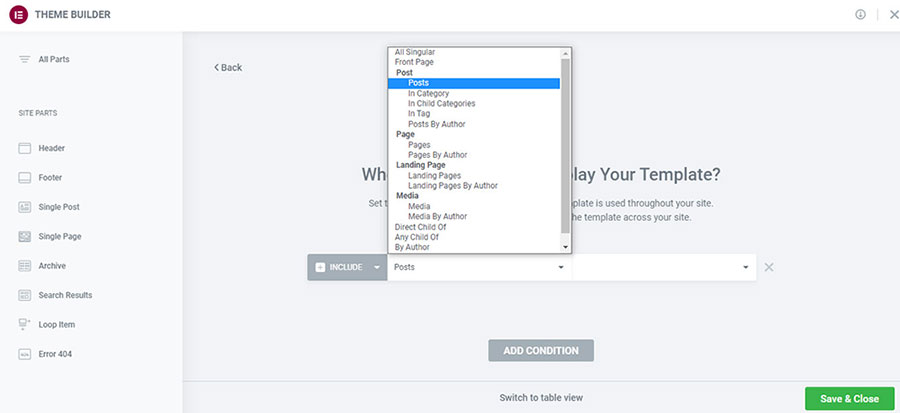
On the screen that appears, I click the arrow next to ‘Entire Site’, choose ‘Singular’, click on the arrow next to ‘All Singular’, and select ‘Front Page’. There are many options for Singular. I can select only ‘Posts’ so my header will appear only on single posts. We also have options for posts of a specific category, child categories, tags, posts by a specific author, pages, and pages by author. The same options are available for Landing Pages and Media, as well as Direct Child of, Any Child of, and By Author. These endless possibilities and combinations provide us with a wide range of customization options. Similar options are available for Archives (Thumb 9).
We see that the Single Post has fewer options since it is a template specific to Posts. Let’s just say I want that specific template to apply to all categories but one. Following the same steps I have already mentioned, I create a Post Template. We see the options provided for the Display Conditions feature below. I click on ‘Edit Conditions’. We see that the default option is to include all Posts (Thumb 10).
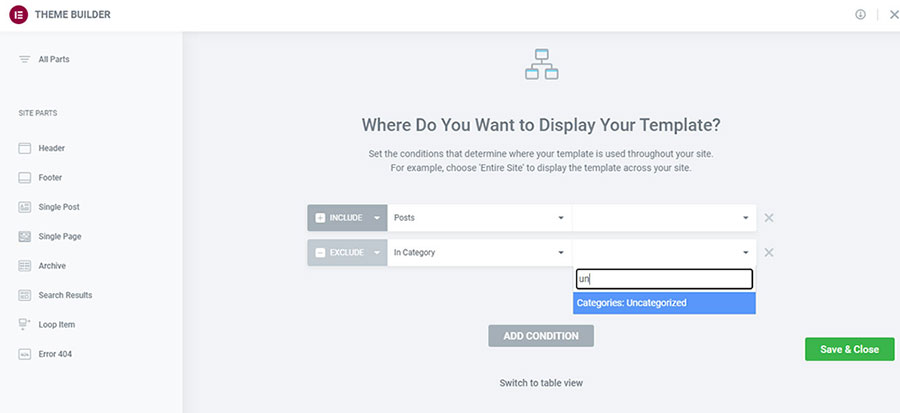
I want to exclude one. So I click on ‘Add Condition’ below and choose ‘Exclude’. Next, I choose ‘Posts -> In Category’, and in the next field, I select the category I wish to exclude by entering the first characters of the category name. Elementor will do the rest and give me the available name options to choose from. I hit ‘Save & Close’, and voila! My template will not be applied to the excluded category (Thumb 11).
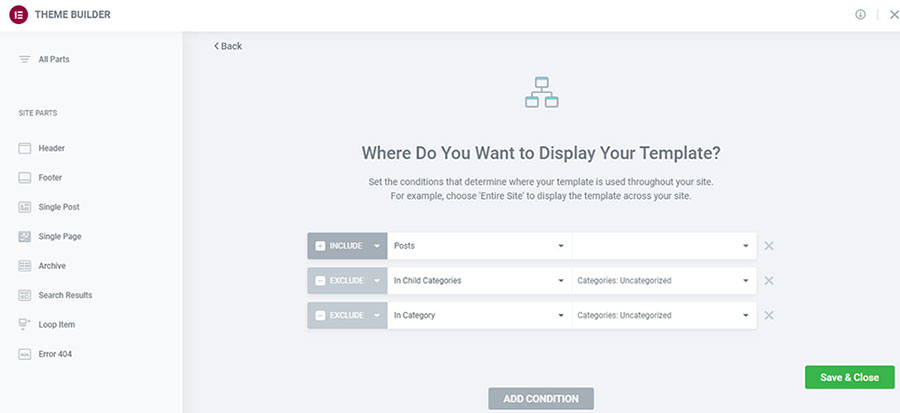
But what if I also want to exclude all the child categories of the above? Then I go and choose from the available options ‘Post -> In Child Categories’ and write the first letters of the parent category whose child categories I want to exclude. Let’s note here that the child categories will be excluded but not the parent one. For that, we will have to add a second ‘Exclude’ rule and follow the steps we have already mentioned about excluding one category (Thumb 12).
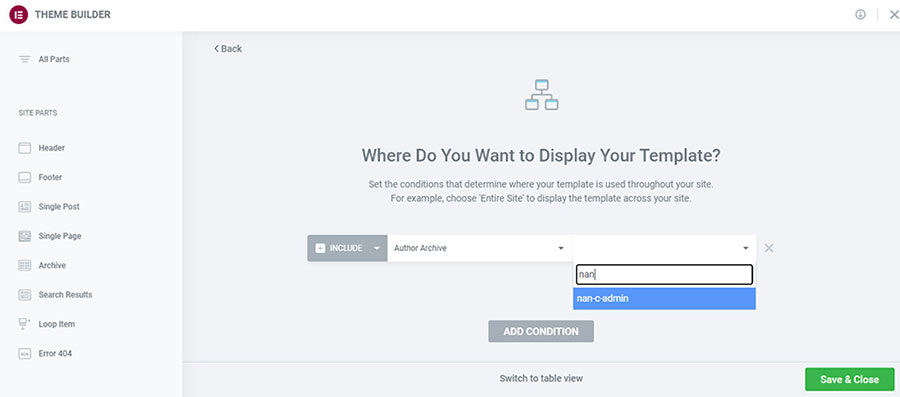
What if I want to use an Archive Template for a specific author but not for the others? Well, I click on the Display Conditions of the Archive Template and choose ‘Author Archive’. I write the first letters of the author’s name and choose the author from the available options (Thumb 13).
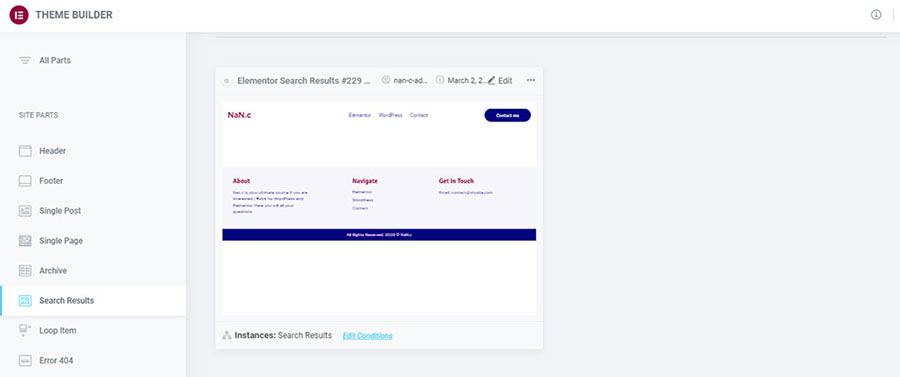
I can also create an additional rule to exclude search results since I require a distinct type of Archive for them. With Elementor, I have the ability to generate a customized Archive specifically for Search Results (Thumb 14).
Implementing Display Conditions for Global Templates
- I go from the Dashboard to Templates -> Theme Builder and choose the template to which I want to apply the conditions from the left sidebar. Let’s say we want to make these changes to the Single Page Template (Thumb 15).
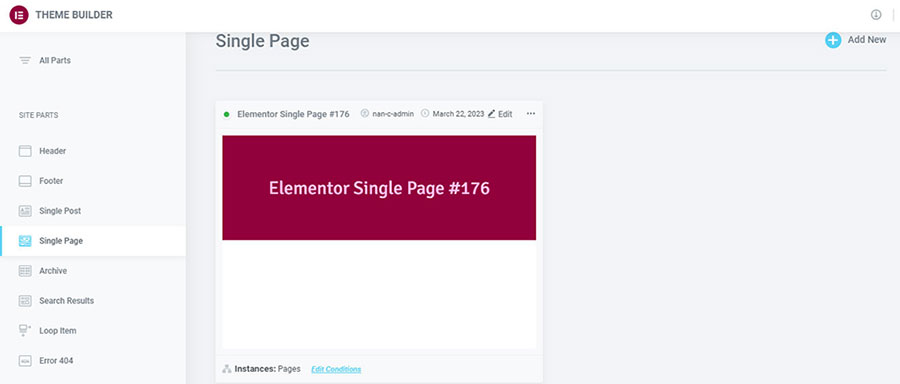
- After clicking on the template, I click on Display Conditions. By default, ‘All Singular’ is selected. I choose the condition I want. Let’s say, for example, ‘Pages by Author’ (Thumb 16).
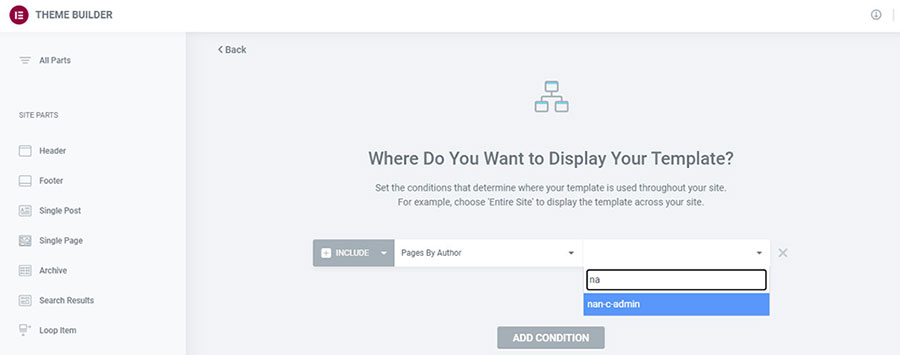
- I write the first letters of the author I want to apply that template to.
- I click ‘Save & Close’ and I am good to go.
Tips for Using Display Conditions Effectively
As we have already seen, the Display Conditions feature for the site parts of Elementor offers us a great deal of customization and flexibility. We can have multiple headers, for example, one for our homepage, one for a specific category, and one for the rest of the website.
We can create different templates for our posts depending on the category, author, or even the tag we choose to apply to each post.
We can customize our pages. Instead of creating a page with Elementor every time, we can create templates for groups of pages and significantly speed up our development process.
By wisely combining Include and Exclude rules, we have virtually limitless options for creating a unique appearance for our website.
Potential issues or challenges that you may encounter
The most serious issue one may face when adjusting the visibility of Elementor’s site parts is the conflict with another template of the same site part. The most probable example of this (which happened to me when I was trying to familiarize myself with this new feature way back then) was overriding my homepage.
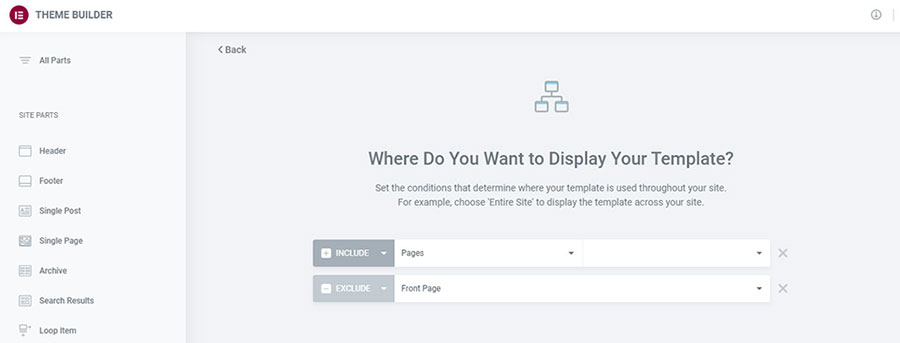
If you go to your Page Template and click Edit Conditions, then choose (all) Pages, your homepage (which is also a Page) will adopt the style of the Template. This means that you will lose all the work you have done for the Front Page (Thumb 17).
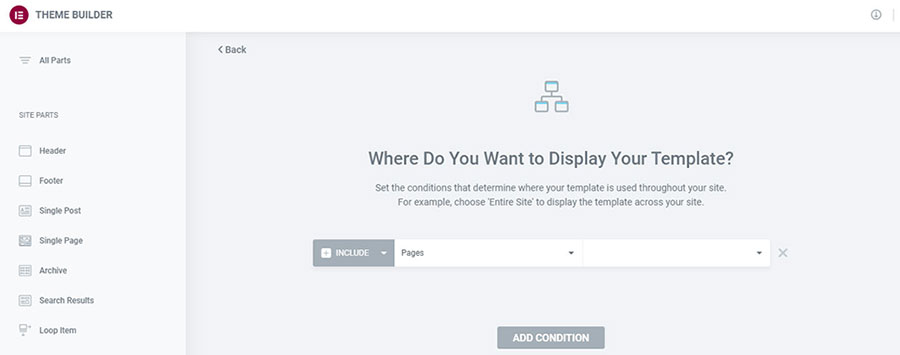
Fortunately, you can undo the damage by simply adding an Exclude rule to exclude your website’s homepage from all the pages (Thumb 18).
Conclusion
All in all, the Display Conditions feature was a massive game-changer for the Site Parts/Templates of Elementor. The amount of flexibility and customization is truly unbelievable. And it beats getting our hands dirty with coding by a long shot, especially for those who are not code-savvy.
In order to become experts in the Display Conditions feature, we must first play around with it and experiment. If you are afraid that you will lose something crucial from the work you have already done, then experiment locally on a copy of your website or try a staging environment. But practice, practice, practice, and see how much time you can save by properly utilizing Display Conditions.


